 A tarp is a very versatile piece of camping gear that all campers should make sure is included in their pack on every camping trip. They are extremely lightweight, can fit all your gear, and are especially useful if you are in an area that experiences dry weather or you do a lot of camping during the summer months, even backpacking. Camping tarps are easy to set up (like a hammock) if there are trees in the area you wish to camp in otherwise it may take some skill and practice before you get it just right.
To properly and effectively set up your campsite on a camping trip with a tarp there are a few steps you should follow to ensure that you are putting it in a suitable location and it will be anchored and supported.
Setting Up a Camping Tarp with Two Trees
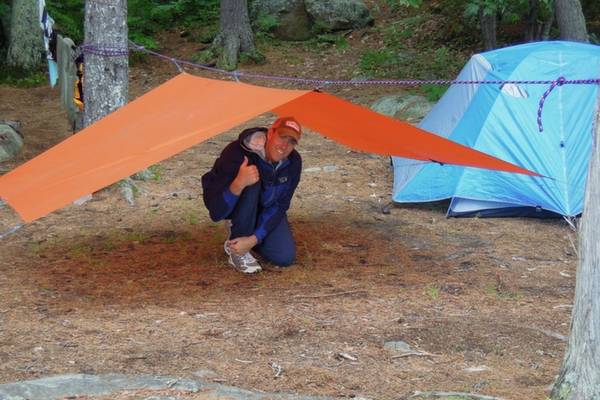
Step 1: Select the Location for Your Camping Tarp
- Locate at least two trees with adequate distance between them and make sure that the ground is level. You can then throw your rope up over a limb. Make sure you have a good 15 to 20 feet of rope to use
- A good campsite will be in close proximity to a water source, (at least 200 feet away to reduce condensation) provide a level area, and is quiet and a decent distance from any hiking trails or other movements
- Are there a lot of stones, sticks, and debris on the ground? You want to be sure you will be comfortable but don’t want to spend a lot of time clearing the ground
Step 2: Wrapping the Rope for Your Camping Tarp
- Once you find the trees and throw the rope, you will then want to wrap the rope around the tree at least two times
- After securely wrapping the rope around the tree, you will then anchor the rope by either tying the rope to itself or around another tree
- Next, you will check the rope to make sure that it is secure and will be able to handle holding up the camping tarp—even when intense winds are present
- Finally, you will throw the rope over a strong limb on the second tree, but it doesn’t need to be tightened around that limb yet
Step 3: Positioning and Securing the Tarp
- After you finish wrapping the rope, it is then time to start to position your camping tarp by placing it over the rope and centering it between the two trees
- Then you will begin to secure the camping tarp to the rope through the eyelid at both ends using small pieces of twine
- Next, you will lift the tarp and then wrap the tree just as you did in step two
- It is then time to attach the rope to each eyelid and then stake the rope six to eight feet away to the other tree
While it may be a labor-intensive procedure to use trees to support the camping tarp, it is also a stable and ideal way to use the tarp. It may take some practice to master each step but the more you practice, the faster you will become.
Setting Up a Camping Tarp with Trekking Poles
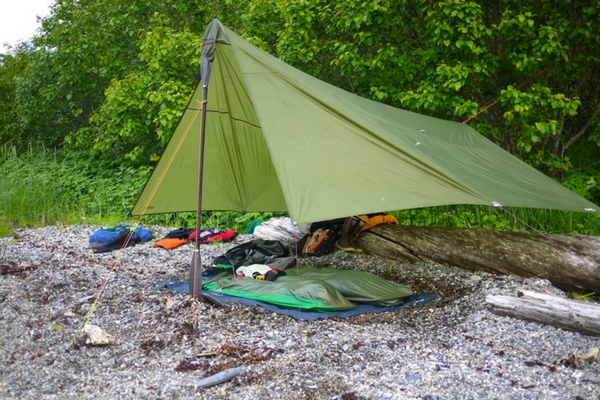
Trekking poles are another common way that people secure and assemble their camping tarps. While they act as support for the tarp, they are also commonly used to help people while they are hiking, especially if the terrain is rough or more difficult. If you choose to use trekking poles, there are three separate ways you can set up your camping tarp.
Clove Hitch Method
The clove hitch is a good knot used for binding and is easy to tie and untie. Keep in mind, however, that a clove hitch can also slip and come undone if the tarp ends up rotating or constant pressure is being placed on the line.
To use this method, you first attach the guyline to the camping tarp and then use the clove hitch to secure it to the trekking pole. You form two different loops with the rope and then cross the first one over the second and then slide it over the pole and finally tighten it.
Upside Down Method
The Upside Down Method uses a non-slip knot like a bowline hitch at the end of the guyline. Then you turn the trekking pole upside down and then slide the loop of the knot over the pole. The pole then goes into the grommet and connects around the stake. Finally, you go back up the loop, add some tension, and then use two half-hitches to finish it off.
Cross-Pole Method
The Cross-Pole Method is another way to secure a camping tarp with trekking poles and also allows more room to enter the tarp when it is an A-frame. Again, you start with tying the guyline to the camping tarp and then hold two trekking poles and slide one of the pole straps over the other handle. You cross the shafts of the poles while creating an upside-down V and then push the poles into the ground. Finally, you can wrap the guyline once around the handle of each pole and turn to add enough tension to your line to secure the tarp.
Final Thoughts
A camping tarp is a very minimalist shelter and is also lightweight and compact. Tarps carry one of the oldest and most classic designs of tents that date back many years and only requires a few things to assemble them.
No matter which method you choose to set up your camping tarp, you will want to ensure that it is properly secured and comfortable. Freestanding designed tents are relatively easy to setup, but a camping tarp is going to take some time and practice to master the skill. When erecting the camping tarp, it is also recommended that you have the entrance to the tarp in the lee of the wind. Doing so will help reduce the wind from entering the tarp and causing it to lose some of its stability and integrity. If the door faces the wind, you will have to deal with the tent constantly inflating and catching air, and it will wreak havoc on what is supposed to be a relaxing trip in nature.